FlightGoggles: Arcade
Setting up an FR SKY Taranis for Windows 10
v1.1
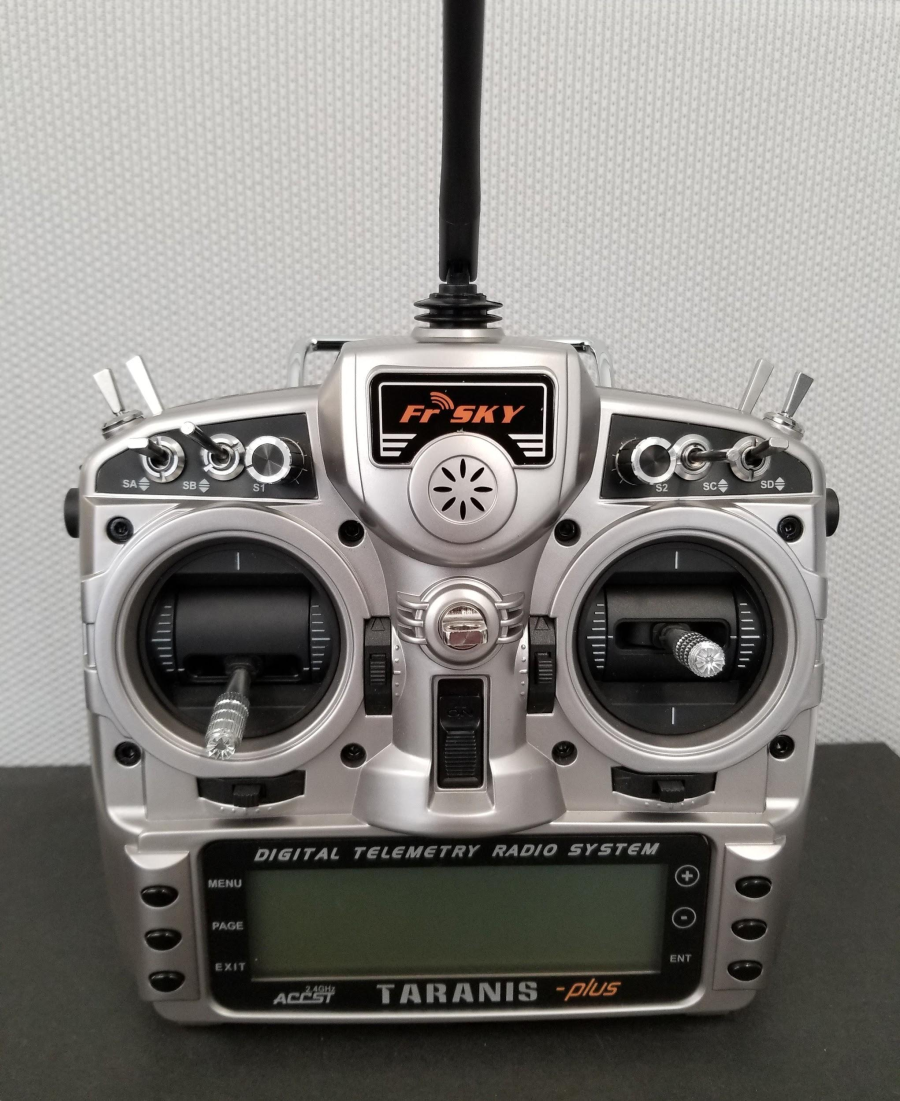
This guide will walk you through setting up your Taranis for FlightGoggles: Arcade on Windows 10.
Initial Setup:
- Have a USB A to Mini-B cable available (Like this one.)
- Make sure your FR SKY Taranis has updated firmware and SD card contents. (OpenTX software here. Tested with version 2.3.5.)
- Make sure that your computer has the correct driver installed. (Pre Windows 10: USB device driver manager here. Windows 10: If it isn't working automatically, uninstall the driver through Windows 10's device manager. Unplug and replug the Taranis, it should autoinstall the correct driver.)
Quick Explanation of Menu Traversal on the Taranis:
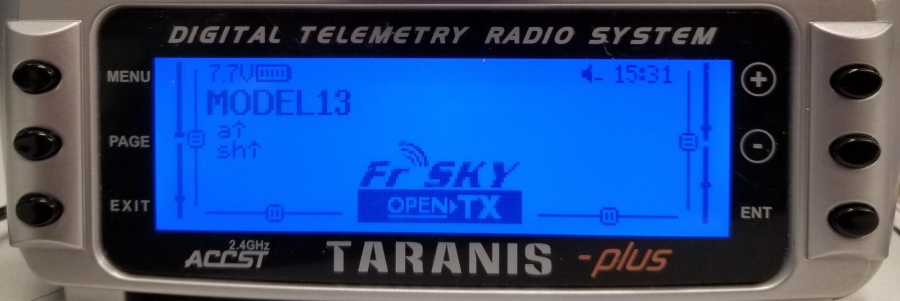
When you first boot the Taranis, you will land on a screen that displays the basic information, including the model currently being used.
- MENU: Pressing Menu from the first screen will bring up a list of available models (MODEL SELECTION). Long pressing Menu from the first screen will bring up the RADIO SETUP menu. Menu titles are in the top left corner in capital letters.
- PAGE: From the first screen, Page can be pressed to see information about which toggles are set up, to see the current joystick channel inputs, and to see the CHANNELS MONITOR. (A long press shows telemetry info, but this is unused in FlightGoggles: Arcade.) If you hit the Page button while inside of certain menus, you will scroll through pages of options. The page number is indicated as a fraction in the top right corner of the screen. A long press on the Page button will go back to the previous page.
- EXIT: Exit will back out of the currently selected item or page. Long press on Exit will back you out all the way to the first screen.
 and
and  : You can scroll through lists on the Taranis by using the
  and
and  buttons.
- ENTER: Hitting Enter will select a setting to change, and then to confirm the change you've made. Long pressing Enter will sometimes bring up a secondary menu. Long pressing Enter while entering letters will swap between capital and lowercase.
The first screen on boot of the Taranis.
Taranis Setup:
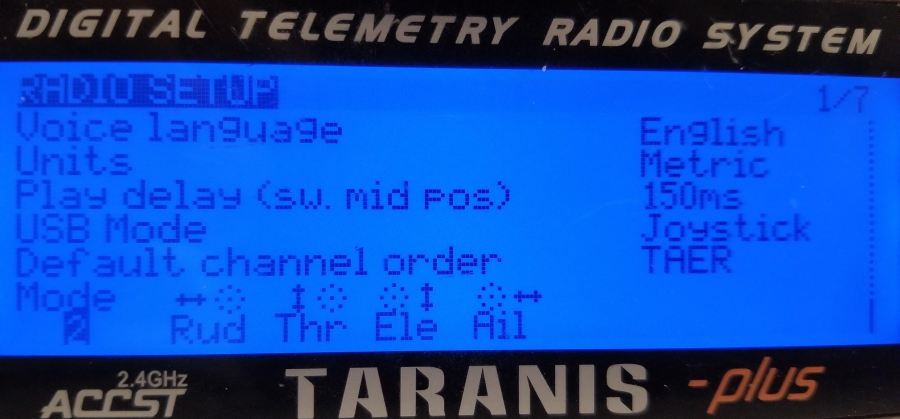
While unplugged from the PC, turn the Taranis on. Long press the Menu button to bring up the RADIO SETUP menu. Scroll down this menu using ![]() and
and ![]() . Scroll down until the setting for 'USB Mode' is highlighted. Hit Enter to change this setting. Scroll (using
. Scroll down until the setting for 'USB Mode' is highlighted. Hit Enter to change this setting. Scroll (using ![]() and
and ![]() through the options until you find 'Joystick'. Hit Enter to save this selection, and then hit Exit to back out to the first screen.
through the options until you find 'Joystick'. Hit Enter to save this selection, and then hit Exit to back out to the first screen.
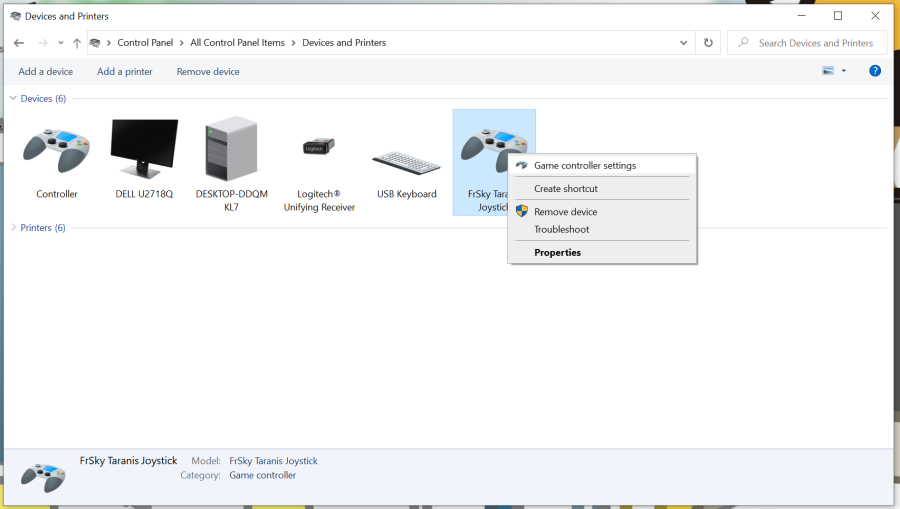
Test this setup by powering the Taranis on, and then connecting it to your computer via USB. Open Control Panel > Devices and Printers. If setup correctly, 'FrSky Taranis Joystick' should appear under Devices as a controller, with 'Game Controller Settings' in the menu on right click. The name may appear differently, but it should be recognized as a controller. If it appears as an unidentified or non-joystick device, review the steps above and make sure that the Taranis is on before it is plugged in.
Model Setup:
In the RADIO SETUP menu, accessible by long pressing the Menu button from the start screen, scroll down to RADIO SETUP, and set the 'Default channel order' to 'TAER.'
If you are having issues with any other input, back out to the initial screen. Hit Page until the CHANNELS MONITOR. This page should display all channel inputs when you input them (moving the joysticks and toggles, etc). If you are missing expected input, go back to HARDWARE and make sure it is setup properly.
Setting up a new model:
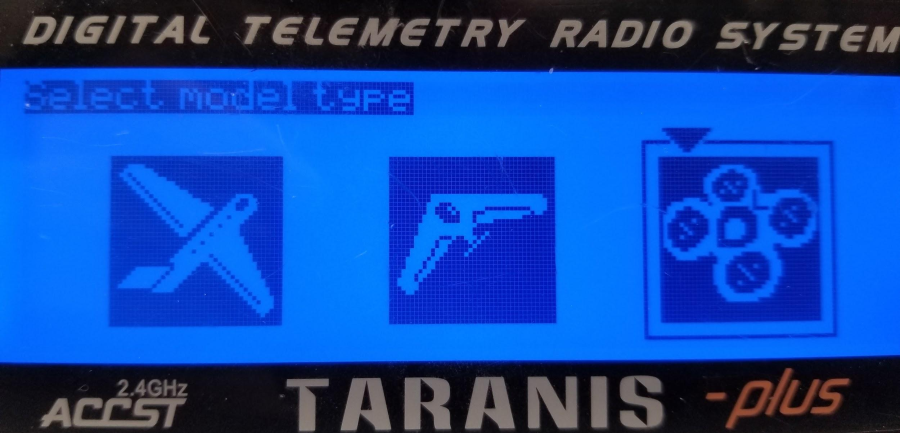
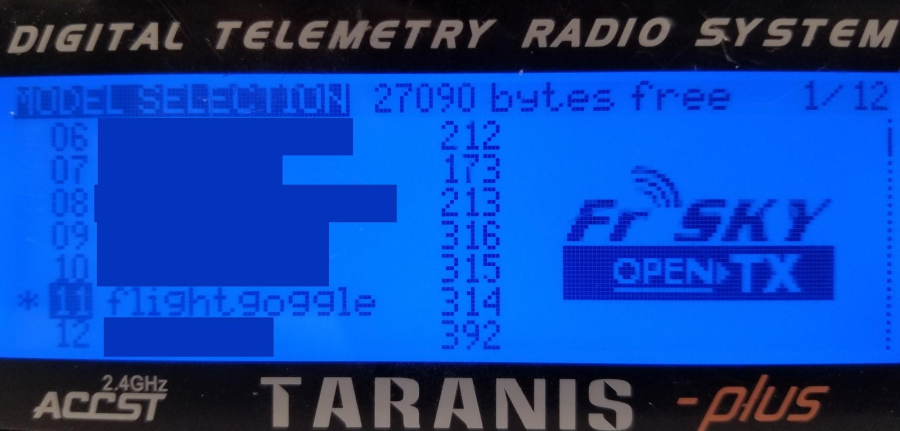
Hit the Menu button to open MODEL SELECTION, and scroll down to an empty slot. Long press Enter and create a new model. Select quadcopter preset option.
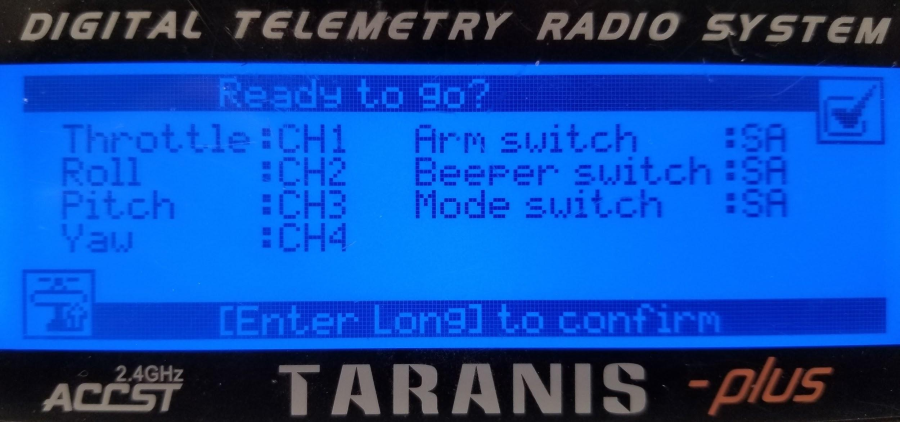
- Set the channels up as such: (Use Page to advance through the setup options.)
- Throttle: CH1
- Roll: CH2
- Pitch: CH3
- Yaw: Ch4
- Ignore the next 3 setup options, as these will be replaced later.
- Long press Enter at the end to accept these settings for your new model!
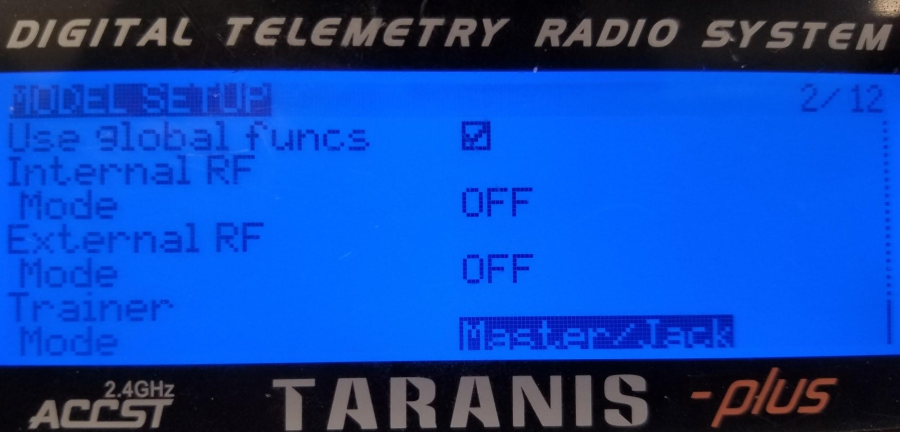
- Highlight your new model. Make sure it is the selected model, which will have an asterisk to the left of it's number and name. If it isn't, long press Enter to open a submenu. Select 'Select Model'. With our new model selected, hit Page to see the MODEL SETUP.
- Give the model a name.
- Scroll down and set 'Internal RF' and 'External RF' Modes to 'OFF'
- Set 'Trainer' Mode to 'Master/Jack'
On the Taranis, user input goes through the hardware > input > mix > output (channels). We need to setup the input and mixes for FlightGoggles: Arcade.
Input Setup:
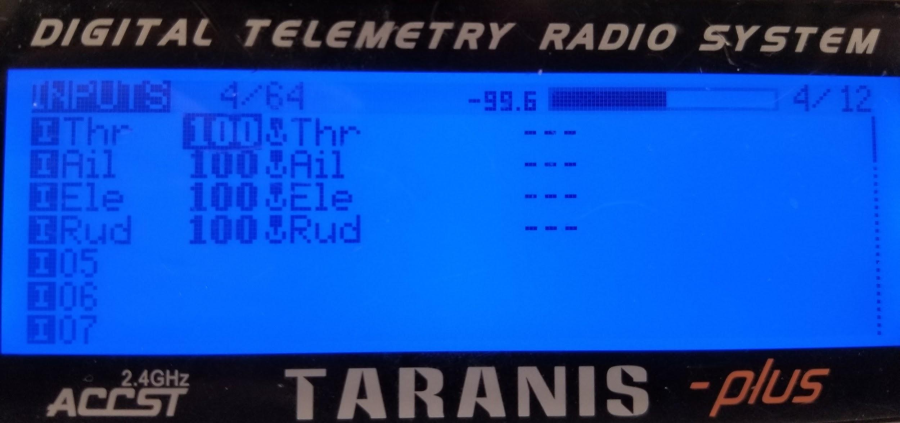
Hit the Page button until you reach the INPUTS page, 4/12.
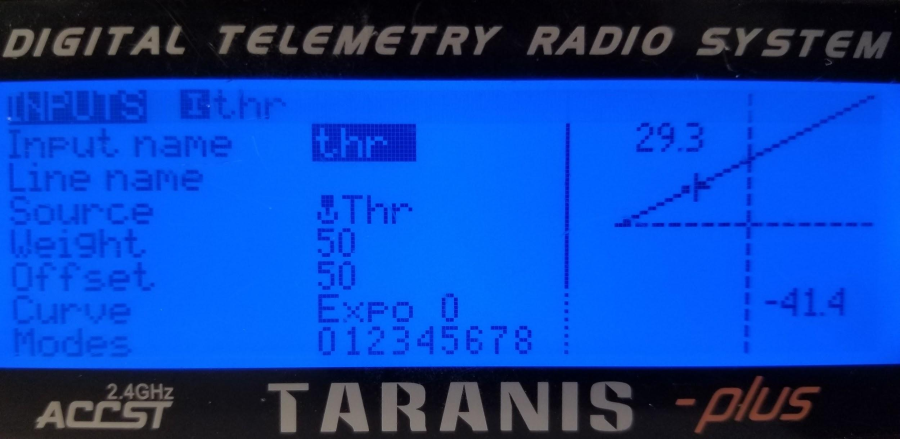
Select Thr, long press Enter and select Edit. Set 'Source' to 'Thr,' 'Weight' to 50, and 'Offset' to 50. If you look at the 'Source', there is a little joystick icon next to 'Thr,' indicating this is now connected to the joystick. Inputs should have sources that are physical parts of the controller, such as joysticks, toggles, etc.
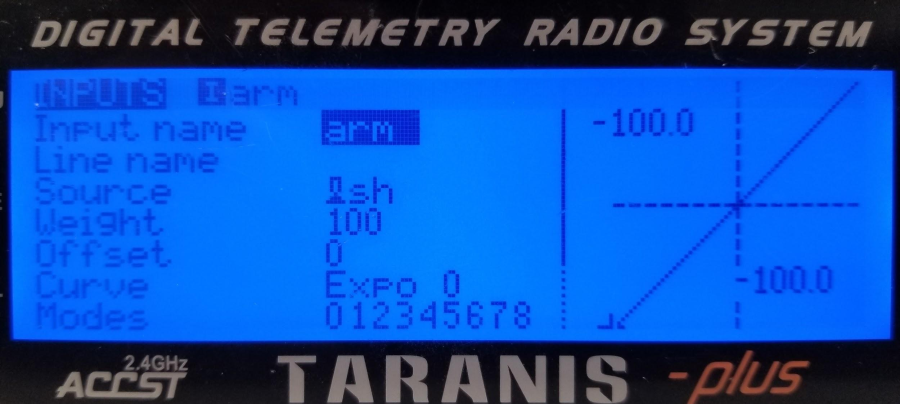
Hit 'Exit', and on the INPUTS page, scroll down to the first empty slot, which should be 05. Long press Enter to make a new input. This will be used to arm the drone. You can name this "Arm" or similar. Set 'Source' to 'SH'.
If you look at the 'Source' we set, 'SH' has a little icon of a toggle next to it. We have set this source to the toggle we set up at the beginning.
Mixes Setup:
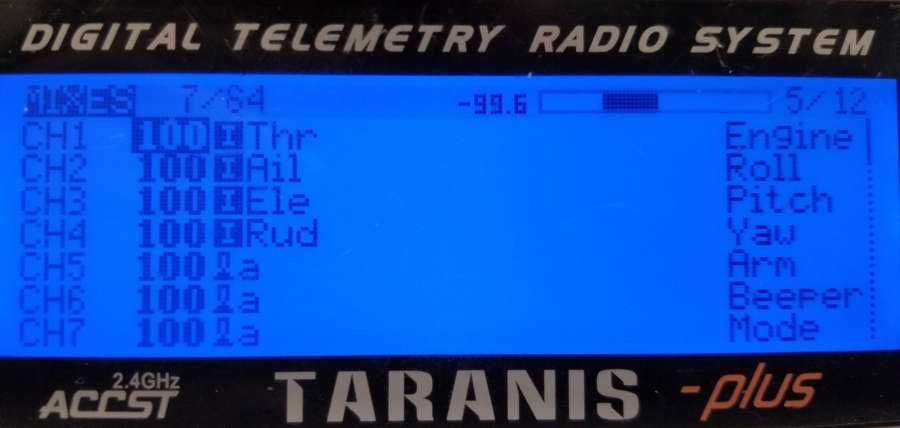
Hit the Page button until you see MIXES, 5/12.
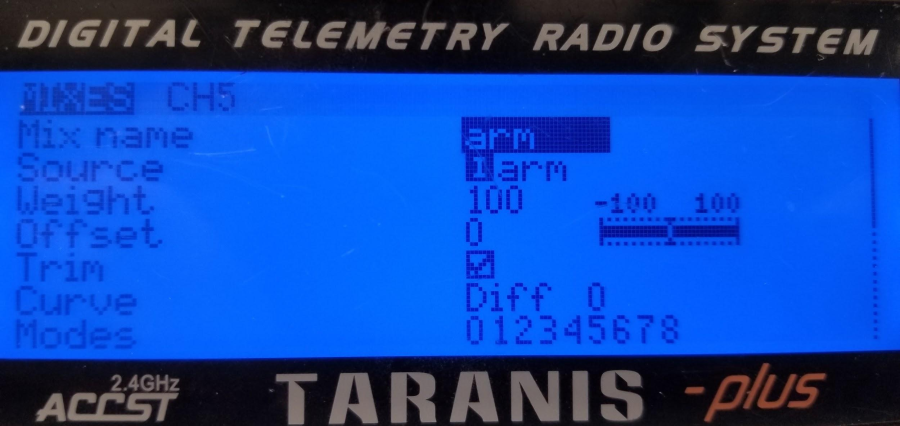
Select CH6, long press Enter, and delete. Delete CH7 as well. Scroll to CH5, long press Enter and select Edit. This will be used to arm the drone, along with the Input we just set up. You can name this "Arm M" or similar. Set 'Source' to 'Arm'. This source should be the arm input we just set up, NOT the toggle itself, so it should have a little I next to the name. Mixes should have sources that are the inputs we have already set up.
Testing:
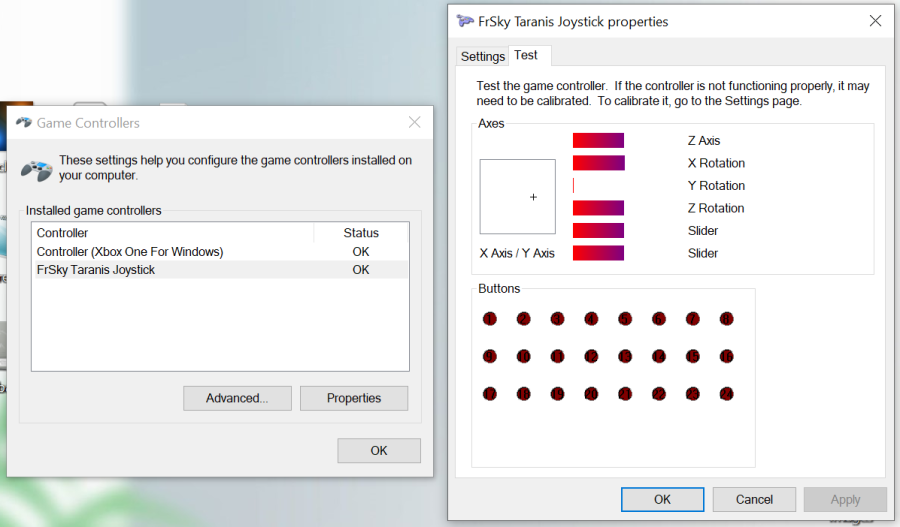
As before, we test this setup by powering the Taranis on, and then connecting it to the computer via USB. Open Control Panel > Devices and Printers. Right click on 'FrSky Taranis Joystick' (The name may appear differently) under Devices. Select 'Game Controller Settings.' Select the Taranis off of this list, and select 'Properties.' Switch to the 'Test' tab. If you wiggle the joysticks or hit the SH toggle, you should see activity on this tab!
Don't worry about what axis is moving for which input, as long as both axis of both joysticks are causing movement in the axes section.
SH Setup:
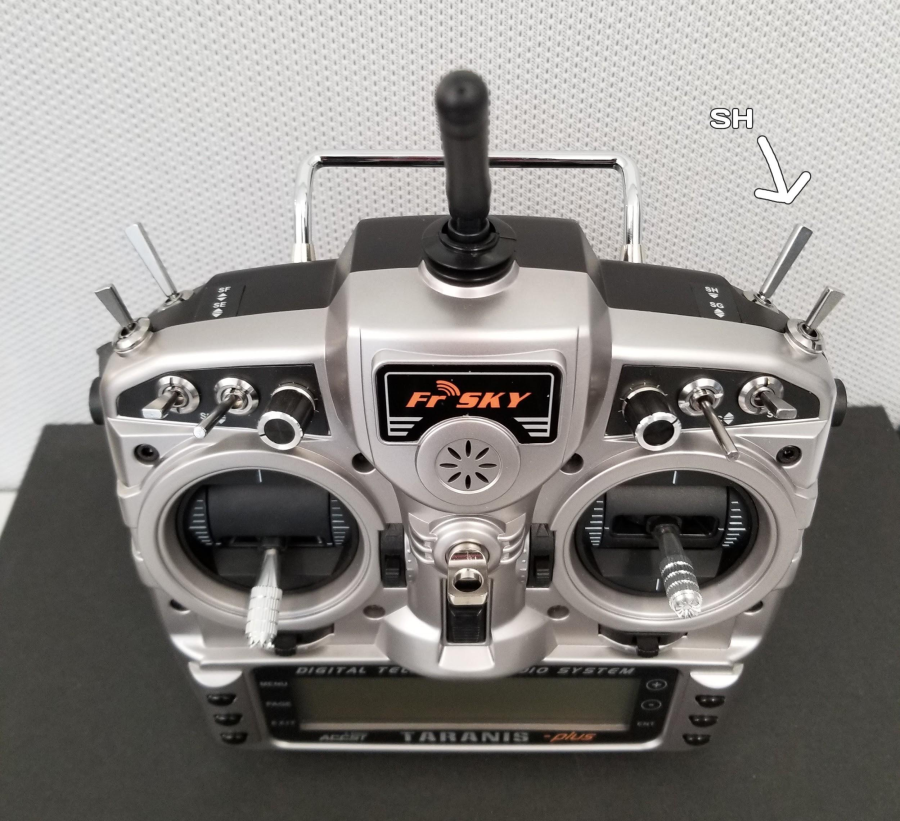
If you would like to set up a toggle or another button on the Taranis, this guide will show you how. We will use the SH toggle on the back right side of the Taranis controller as an example.
In the RADIO SETUP menu, accessible by long pressing the Menu button from the start screen, press Page a few times, until you see HARDWARE, 6/7. Scroll to the bottom and set the switch 'SH' to 'Toggle' and name it "SH". Hit enter to start editing. For each letter, change the letter with ![]() and
and ![]() , hitting Enter when you've found the correct letter. (Long pressing Enter will swap between capital and lowercase.) Name this whatever you like. Exit out to the main screen.
, hitting Enter when you've found the correct letter. (Long pressing Enter will swap between capital and lowercase.) Name this whatever you like. Exit out to the main screen.
SH is a toggle located on the right shoulder of the Taranis (in the rear, with SG in front). It is a toggle that automatically resets to the off position after release.
If you are having issues with SH or any other input, back out to the initial screen. Hit Page until the CHANNELS MONITOR. This page should display all channel inputs when you input them (moving the joysticks and toggles, etc). If you are missing expected input, go back to HARDWARE and make sure it is setup properly.
To check the SH functionality, look at the FrSky Taranis Joystick properties in the Control Panel. (See the Testing section on how to get there.)
Confirm that SH is causing movement in the axes section. (SH is considered an axis, NOT a button, due to the way the toggle is built.)
